Setting up a Virtual Private Network (VPN) isn’t as tricky as it sounds. They are essentially just like any other program or application and need to be installed and, in some cases, configured. Installing a VPN on Android is a little different.
Research house IDC has forecast that the number of smartphones shipped will drop slightly this year over the last. Even with the dip, an estimated 1.3 million smartphones will be shipped by the end of 2019. The majority of those – over 1.1 billion – will be powered by Android.
Why Use a VPN on Your Smartphone?
The digital age has seen many of us increasingly using our smartphones for various activities. These can be anything from simple web browsing to work communication and digital banking activities. The problem is that smartphones constantly move around and connect to multiple networks.
Unlike when we’re at home and have control over our WiFi, using a cellular network or even public WiFi is much more dangerous. Using these networks opens you up to everything from man-in-the-middle attacks to rogue WiFi networks specially set up to steal data.
To protect yourself against these dangers, a VPN is the logical choice. Not only can it keep you anonymous, but it encrypts your data at the same time. In fact, many top VPNs today are feature-packed and come with many extras, such as ad blockers.
Read our Comprehensive VPN Guide to learn more about VPNs and what devices you can use them on.
Step 1: Sign up for Surfshark VPN
You’ll first need to decide which VPN service to choose. I’m partial to Surfshark for a mobile VPN as it offers immense value for money. In this example, I will guide you through installing Surfshark on your mobile.
- Visit the Surfshark website and click on ‘Get Started’. You’ll be given a choice of subscription plan. Choose to sign up for a one-month, one-year, or two-year plan. Signing up for the two-year plan gives you a big discount and only costs $1.99 monthly. The annual or two-year plan will entitle you to Surfshark’s 30-day money-back guarantee.
- Once you’ve chosen your plan, enter your email address. This is only used to contact you for billing purposes.
- After that, choose your payment method. Surfshark offers many payment methods, including credit card, PayPal, Google Pay, Alipay, or cryptocurrency.
Step 2: Installing the VPN on your Smartphone
Once you’ve signed up for SurfShark and paid for your plan, you will get a welcome email from them. There are links to their mobile app in that email, or you can download it from Google Play or get the Surfshark APK file directly from their site.
- Install the Surfshark app on your mobile device. Once that’s done, simply launch the app and log in using your account details.
- Once you’ve logged in, tap on ‘Quick Connect’, and the app will automatically choose the best server for you.
Typically, these are the only steps you must take to enjoy the protection of Surfshark VPN on your Android smartphone. However, in case you have specific needs, you can access other options through the Settings menu.
Step 3: Using the Surfshark Android App
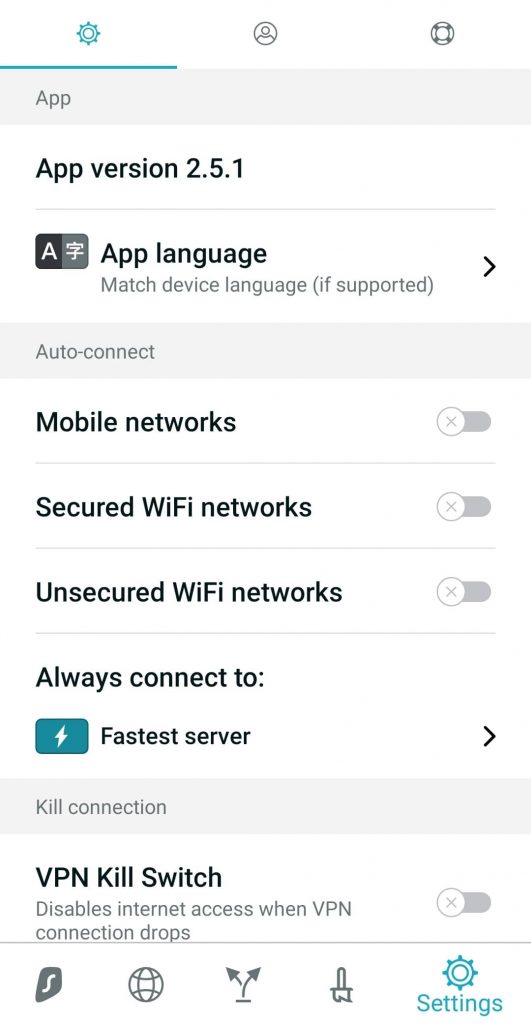
On the bottom right of the app screen, there will be a little gear-like icon. Tapping on that will open the Surfshark settings menu.
In this menu, you will be able to do a variety of things, such as choose when to auto-connect, which servers to connect to by default, and more.
It would be advisable to ensure that the VPN Kill Switch is enabled so that anytime your Internet connection is lost, the app will stop all data traffic on your smartphone.
The default protocol on their mobile app is IKEv2. This is an excellent protocol for mobile connections as it is designed to handle hopping from one network to another with ease.
If you feel that the protocol isn't to your liking you can also change it to something else from the settings menu.
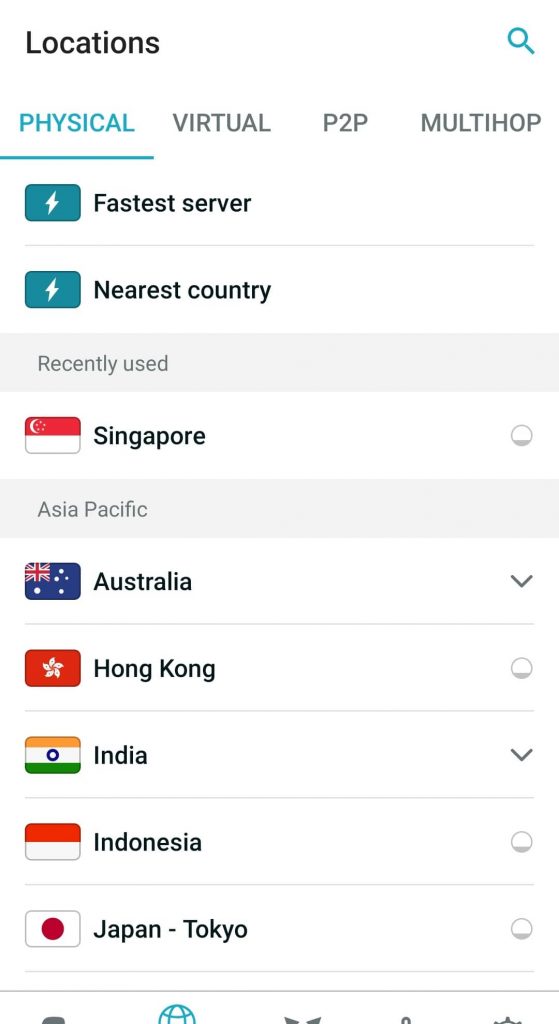
If you click on the globe icon, you will be shown a list of countries where Surfshark has servers. These potential connections are sorted into four categories.
Physical is the list of servers sorted by their actual location. This can be useful if you want to connect to VPN servers in a particular country.
Virtual is the list of Surfshark virtual servers. These servers are spoofed locations, meaning that Surfshark doesn't actually have a server at that location but can emulate your IP address as being from that area.
Connect to a P2P server if you intend to use torrent software to download files.
Multi-hop is for the more paranoid, and using those options will see your connection being routed through two different countries' VPN servers.
Conclusion: VPN on Android is Easy!
As you can see, installing and setting up a VPN connection on an Android smartphone is extremely easy. Normally, the default settings will work fine for most people. I advise you to get used to those first, and as you gain familiarity with the application, tweak the settings to get it working exactly the way you want.
Using a VPN application on your smartphone will drain your battery life a little faster. This is because the application is constantly running in the background, just like your other applications that are checking for updates.
Still, smartphones today come with very good battery life, and this is a small price to pay for securing your identity and data.
Remember that signing up for a VPN service like Surfshark means you can install apps and use the VPNs on multiple devices simultaneously. Most VPN services limit you to 3 to 7 simultaneous connections per account.
Surfshark takes away that limit, so you can use your account on as many devices as you want – your PC, smartphone, tablet, smart TV, router, and anything else you can think of. Stay safe today and sign on with them for peace of mind.